
A faulty radiator sensor can cause various issues like incorrect temperature readings, engine performance problems, and unusual noises. Promptly visit a radiator shop for a checkup to prevent further damage. Prepare essential tools and safety gear before attempting any radiator repair service. Diagnose a bad sensor by checking voltage, inspecting for damage, and noting symptoms. Replace it with a compatible new sensor following proper installation techniques. Regularly inspect the cooling system for leaks, damage, and coolant levels to maintain optimal efficiency and prevent breakdowns.
“Experience a spiking engine temperature or a fluctuating fan speed? Your car’s radiator sensor could be at fault. This comprehensive guide dives into the process of testing and repairing a bad radiator sensor, empowering you with the knowledge for DIY solutions. Learn to identify common symptoms, acquire the necessary tools, follow step-by-step diagnosis and replacement procedures, and maintain your vehicle’s cooling system efficiency. For those seeking professional assistance, understanding these processes can help communicate effectively with a top-notch radiator repair service.”
- Identify Common Symptoms of a Bad Radiator Sensor
- Tools and Equipment Needed for Repair
- Steps to Test and Diagnose the Issue
- Replacing the Radiator Sensor: A Step-by-Step Guide
- Tips for Maintaining Optimal Cooling System Performance
Identify Common Symptoms of a Bad Radiator Sensor

If your vehicle’s cooling system is acting up, it could be a sign of a bad radiator sensor. This small but crucial component plays a vital role in regulating your car’s temperature. When it fails, you might notice several telltale signs that something is amiss. One of the most common symptoms is an unusual temperature reading on your vehicle’s dashboard. The gauge may show the engine is overheating when it shouldn’t be, or it might read much lower than the actual temperature. This can lead to a local radiator shop recommending a cooling system checkup as a preventative measure.
Other indicators include sudden changes in engine performance, such as stalling or loss of power. This often occurs because the faulty sensor is sending inaccurate signals to the engine management system. Moreover, if you hear unusual noises coming from under the hood, like bubbling or hissing, it could be a sign of fluid leaks or air bubbles in the cooling system, which are often associated with bad radiator sensors. Don’t ignore these symptoms; promptly visit a reputable local radiator shop to avoid further damage and ensure your vehicle’s longevity. Remember, a simple radiator repair service can go a long way in maintaining your car’s performance and safety.
Tools and Equipment Needed for Repair

Before beginning any radiator repair service, ensure you have all the necessary tools and equipment on hand to make the process efficient and effective. A basic set for this task includes a voltage meter, wrenches (both standard and socket), screwdrivers (flathead and Phillips), wire strippers, and pliers. For more complex issues, you might need specialized tools like an OBD-II scanner or a replacement sensor.
The right gear is crucial for a successful fix leaky radiator or fix a cracked radiator endeavor. Safety goggles protect your eyes from debris, while gloves safeguard your hands during the disassembly process. A new sensor and any seals or gaskets required for replacement are essential components to have readily available. Having these in place will enable you to complete the repair promptly and with confidence, ensuring your vehicle’s cooling system functions optimally once more.
Steps to Test and Diagnose the Issue
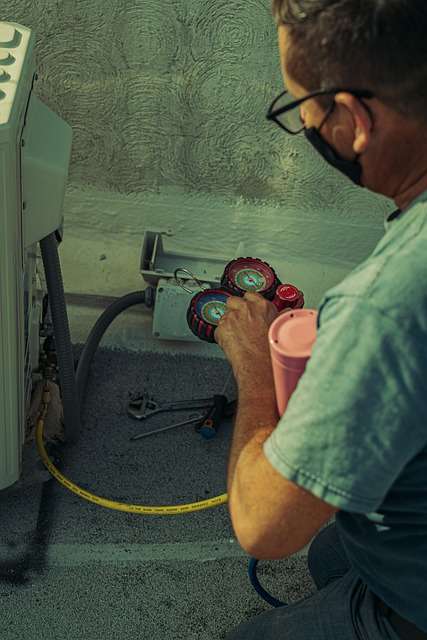
To test and diagnose a bad radiator sensor, start by locating the sensor, which is typically found near the engine’s cooling system. Once identified, use a multimeter to check for voltage at the sensor—a functioning sensor should read a specific voltage under different operating conditions. If readings are inconsistent or absent, it indicates a potential issue. Next, visually inspect the sensor for any visible damage, corrosion, or loose connections. Corrosion and debris can interfere with the sensor’s performance, so safe radiator removal and careful examination are crucial steps in the process.
Furthermore, consider the symptoms your vehicle may be displaying. Increased engine temperature, warning lights on the dashboard, and overheating issues are common signs of a faulty radiator sensor. Prevent car overheating by identifying these indicators early. If you suspect a problem, don’t delay; consult a professional radiator repair service to diagnose and fix the issue effectively. Keep in mind that the cost of repairs can vary, with how much to repair a radiator depending on the extent of the damage and your vehicle’s make and model.
Replacing the Radiator Sensor: A Step-by-Step Guide

Replacing a faulty radiator sensor is a task that many vehicle owners can tackle as part of a basic radiator repair service. Before beginning, ensure you have the necessary tools and replacement parts, including a new sensor compatible with your car model. The process typically involves disconnecting the old sensor from its wiring harness, which is often held in place by plastic clips or brackets. Once freed, carefully note the sensor’s positioning for accurate reinstallation later.
Next, locate the DIY radiator replacement by referring to your vehicle’s manual or online resources. This may involve removing other components like the radiator cap or shrouds. With the old sensor out, install the new one, ensuring it fits securely and is correctly aligned. After tightening any securing mechanisms, reattach any removed parts and double-check connections. Remember, proper boiler repair techniques are key to preventing car overheating, so take your time and consult a professional if needed for complex cases.
Tips for Maintaining Optimal Cooling System Performance

Maintaining a well-functioning cooling system is vital for keeping your vehicle in top shape and preventing costly breakdowns. Regularly checking and maintaining your car’s radiator sensor is a crucial part of this process. A faulty sensor can lead to overheating, reduced engine performance, and even permanent damage to the cooling system. To ensure optimal efficiency, it’s recommended to follow these tips:
One key practice is to stay on top of regular inspections. This includes visually examining the radiator for any signs of leaks or damage, checking the levels of coolant, and verifying that all hoses are secure and in good condition. Additionally, keep an eye out for unusual noises coming from the engine bay, as they might indicate a problem with the cooling system. Among the essential tasks is the periodic replacement of the radiaor hose, which can weaken over time due to heat and exposure, leading to leaks. When considering a radiator repair service, having a comprehensive understanding of the required radiator hose replacement instructions and gathering the suitable radiator repair tools needed will ensure a smoother process. Remember, timely maintenance, such as promptly addressing when to change the radiator, can significantly extend the lifespan of your vehicle’s cooling system components.
Testing and repairing a bad radiator sensor is a crucial step in maintaining your vehicle’s cooling system. By identifying common symptoms, having the right tools, and following a systematic approach, you can effectively diagnose and replace the sensor. Regular maintenance, including checking for leaks and ensuring proper fluid levels, is key to preventing future issues. For those who are not comfortable with DIY repairs, considering a professional radiator repair service can ensure your vehicle’s cooling system operates at peak efficiency.